Customize macOS with Hidden Settings with Terminal: A Designer’s Guide
Tailor your Mac beyond the defaults. No coding degree required.
I have a confession: I dropped out of a computer science degree to pursue design, yet here I am geeking out over Terminal commands. As a designer, I love customizing my Mac’s behavior beyond what the System Settings app offers. Luckily, macOS has hidden settings accessible through the Terminal’s defaults command . Don’t worry, you don’t need to be a programmer to use these. It’s basically copy-paste!
Below, I’ll share some of my favorite hidden macOS tweaks and how to enable them. Each tweak comes with a one-line Terminal command and a quick way to undo it if you change your mind.
Open the Terminal app (search for it via Spotlight with CMD + Space, then type “Terminal”) and let’s unlock those secret settings.
Before You Start
- Copy and paste exactly. These commands are picky.
- Most tweaks are easily reversible. I’ll include a revert for each.
- Some changes need an app restart. Finder and Dock are the usual suspects.
- Password prompts can happen. That is normal for certain system-level changes.
My top 5, if you only do a few
- Dock spacers (organization without effort)
- Remove Dock delay (instant focus mode)
- Always expand Save dialog (saves clicks forever)
- Screenshot folder location (stop screenshot landfill)
- Show full Finder path (always know where you are)
The Defaults Command
Don’t panic, this is the “settings” app, but in text form.
If you’ve never used Terminal, the vibe can feel like “one wrong move and my Mac explodes.” I get it. The good news is that defaults is not some mysterious hacker tool. It’s just a way to change preference settings that macOS apps already use, but do not always expose in System Settings.
Think of it like this:
- System Settings = the switches Apple lets you see
- defaults = the switches that still exist, but are hidden behind the curtain
You are not rewriting macOS. You’re flipping preference values on and off.
General format:
defaults write <domain> <key> <value>What Defaults Actually Changes
macOS apps store preferences in files (usually .plist files). defaults is a command-line shortcut for reading and updating those values.
So when you run a command like this:
defaults write com.apple.finder AppleShowAllFiles -bool trueYou’re basically telling macOS:
“Hey Finder, for the setting called
AppleShowAllFiles, set it totrue.”
Finder then changes how it behaves next time it loads that preference.
The General Format for Defaults
Here’s the shape of most of these commands:
defaults write <domain> <key> <value>Here’s what each part means, in normal-human terms:
<domain>
Aka: which app or system area are we changing?
This is the “bucket” of settings you’re touching.
com.apple.finder= Finder preferencescom.apple.dock= Dock preferencescom.apple.screencapture= Screenshot preferencesNSGlobalDomain= system-wide preferences (applies across apps)
If you’re curious, com.apple.finder is basically Finder’s unique identifier (an “app ID”). That’s how macOS knows which app’s settings you mean.
<key>
Aka: which specific setting?
This is the name of the preference. Think of it like an internal settings label.
Examples from this article:
AppleShowAllFiles(Finder hidden files)_FXShowPosixPathInTitle(Finder title path)showhidden(Dock dim hidden apps)
Keys look kind of nerdy because they were created by engineers, not writers. You don’t need to memorize them. You just need to paste them correctly.
<value>
Aka: what are we setting it to?
This is the new value you’re assigning to the key.
Common types you’ll see:
- Boolean: true / false
- Integer: 1, 0, 2
- Float (decimal number): 0.2, 0.5, 0
- String: “something”
In this article, most tweaks are simple booleans (true/false) or floats (animation speed).
Why So We Run “killall Finder” & “killall Dock” Commands?
Some apps do not immediately reload their preferences while they’re running. Finder and Dock are the biggest offenders.
So you’ll often see:
killall FinderThat just restarts Finder so it re-reads its preferences. Same with:
killall DockIt sounds violent, but it’s not. You are not deleting anything. You’re basically telling macOS:
“Close this app and relaunch it so the setting takes effect.”
Why Am I Being Asked for My Password?
Sometimes macOS asks for your password when a change touches more protected settings. That is normal.
It does not mean something is wrong. It is a verification step to make sure:
- it’s really you at the keyboard
- it’s not a random program changing system behavior silently
Also important: when you type your password in Terminal, it won’t show dots or characters. It will look like nothing is happening. That’s normal too. Type it and press Return.
Why Use Defaults at All?
Because it gives you control over the macOS environment in ways Apple does not always surface:
- Personalizing system behavior
- Unlocking hidden or experimental features
- Speeding up animations and interactions
- Workflow optimizations (especially if you bounce between design + dev work)
And because a lot of these tweaks are genuinely practical. Some are tiny quality-of-life wins. A few are “how was this not a setting already?” level.
Now that you know what you’re looking at, the rest of the article becomes way less intimidating. It’s just:
Pick a behavior → paste a command → restart the app → enjoy → revert if needed.
Tweaks by Category
As you go through this article, I have broken up the Terminal commands by category. Each one is: has what it does, the command, and how to revert or undo it.

Show Hidden Files in Finder by Default
By default, Finder hides “dotfiles” (files or folders that start with a .) and other system items. If you frequently work with web or config files (like .gitignore or .env files) or just want to see everything on your drive, you can make Finder always show hidden files .
Run this command in Terminal and hit Return:
defaults write com.apple.finder AppleShowAllFiles -bool true; killall FinderThis will restart Finder and reveal all hidden files (no need to manually relaunch Finder; killall Finder handles that). You should now see previously invisible files (often gray-colored) in Finder windows.

Revert: If your Finder is suddenly too cluttered for your taste, you can hide those files again.
defaults write com.apple.finder AppleShowAllFiles -bool false; killall FinderShow the Full File Path in Finder’s Title Bar
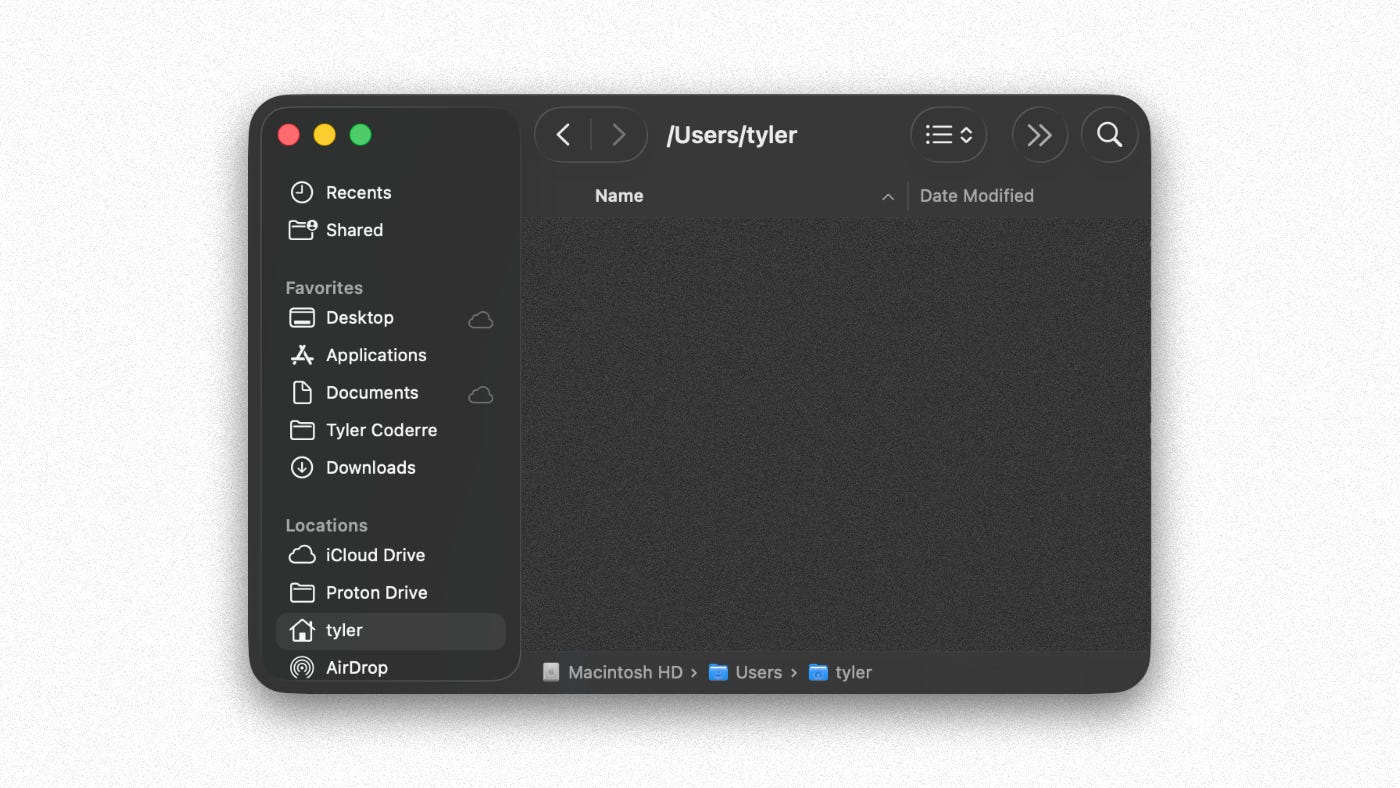
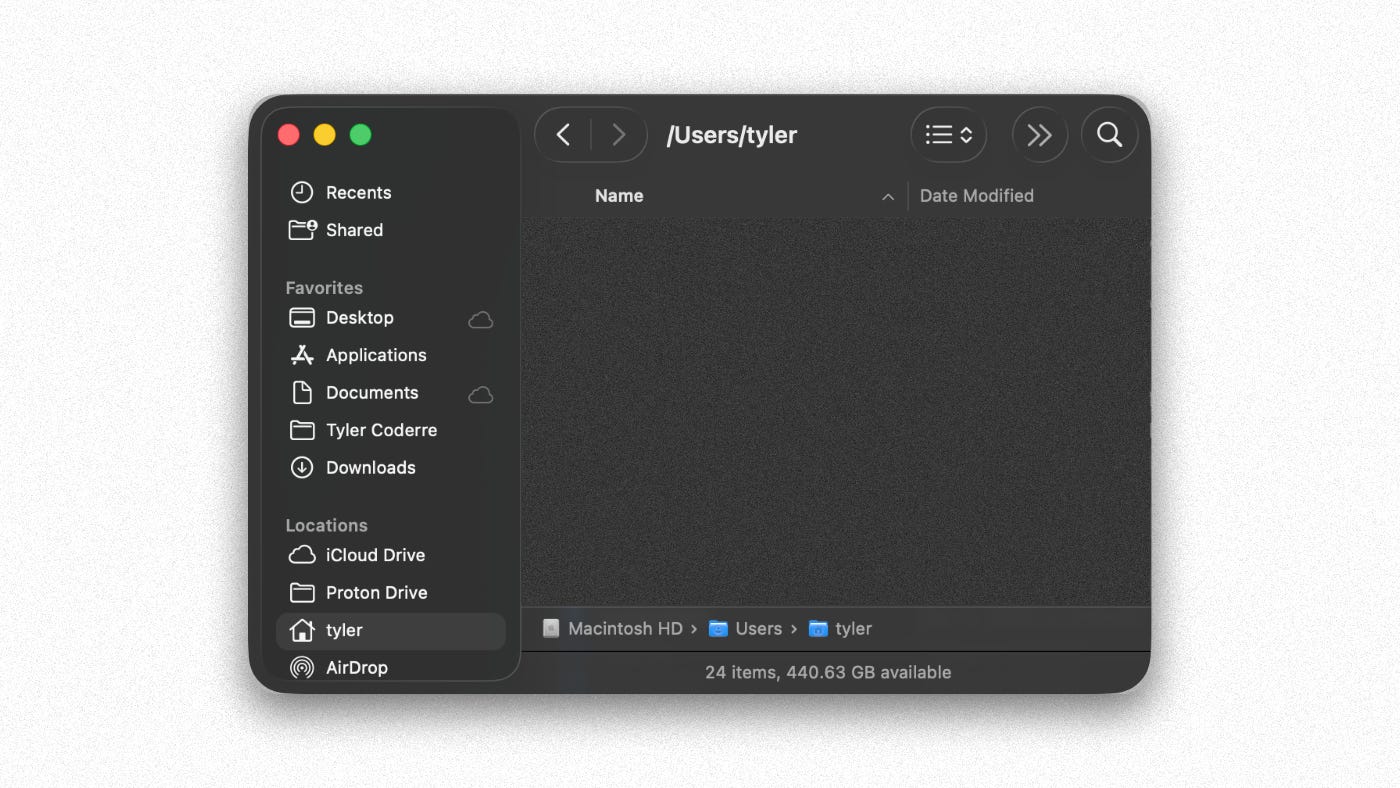
Ever get lost in nested folders and wish Finder would just tell you the full path of the directory you’re in? By default, Finder’s title bar only shows the current folder name, but you can make it display the entire path from root to your current location . This gives you instant context about where you are in the filesystem (super handy for power users and designers rummaging through project assets).
To enable this, run:
defaults write com.apple.finder _FXShowPosixPathInTitle -bool true; killall FinderOnce you press Return, Finder will restart, and each Finder window’s title bar will show the full directory path (in small text) instead of just the folder name . For example, if you’re viewing Pictures/Design/Assets, the title bar will say /Users/YourName/Pictures/Design/Assets instead of just Assets.
Revert: Not feeling it? You can hide the full path again by changing -bool true to -bool false and running the command once more . Finder will go back to showing only the folder name. (By the way, even without this tweak, you can always Command-click a window title to see a dropdown of the path — a neat built-in trick!).
Enhance Finder with Further Stats
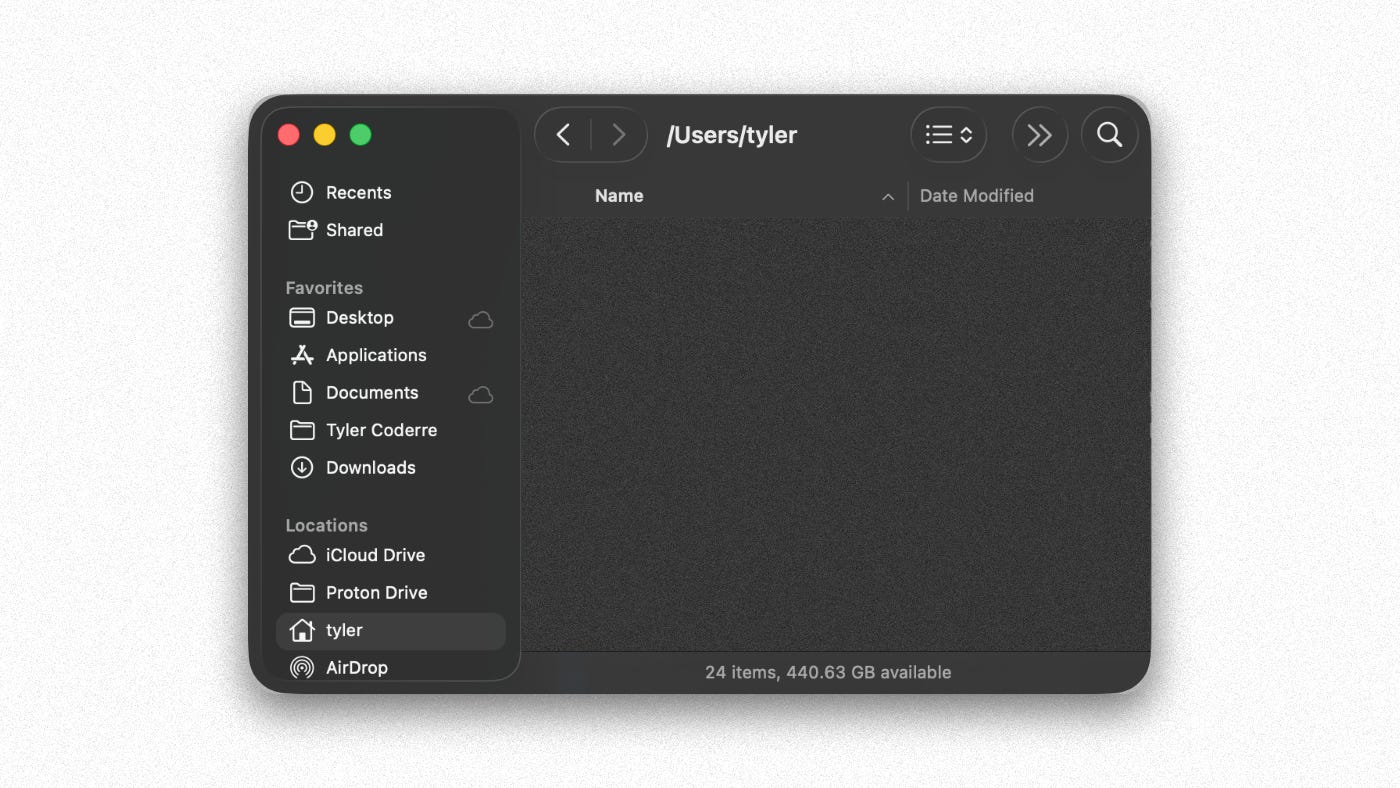
Show Status Bar
You can get further information on the location and file details in Finder with this simple command:
defaults write com.apple.finder ShowStatusBar -bool true && killall FinderNow you have insights on sizes, file counts, and space available on the drive you’re on, all in one convenient and glance-able place.
You can even pair this with the path bar:
Revert:
defaults write com.apple.finder ShowStatusBar -bool false && killall FinderEnable the “Quit Finder” Option
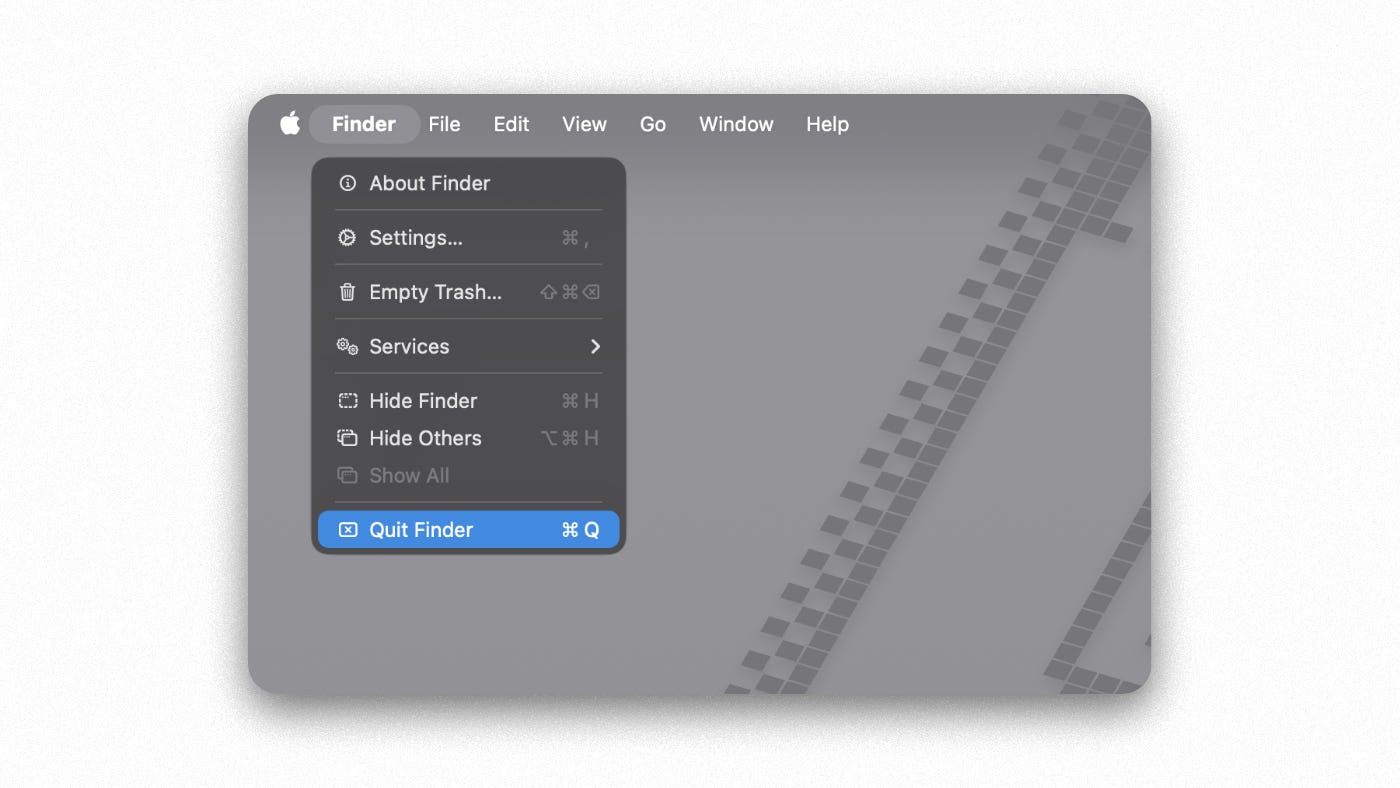
If you look at Finder’s menu bar, you’ll notice there’s usually no Quit option since Finder is always running by design. But maybe you want to quit Finder like a regular app (perhaps to free up some memory or because you just want to say you can). This hidden setting adds a Quit Finder item to the Finder menu.
Enable it with:
defaults write com.apple.finder QuitMenuItem -bool true; killall FinderWhen Finder reloads, click the Finder menu — you’ll see Quit Finder listed now . You can even use Cmd + Q to close Finder like other apps. Keep in mind that quitting Finder will close all Finder windows and remove desktop icons until Finder automatically restarts (which it typically will when needed, or you can relaunch it manually). The macOS defaults database notes that this tweak “behaves strangely” and generally isn’t recommended for everyday use — but it’s a fun trick to know and can be useful in certain cases.
Revert: To remove the Quit option, run the same command with false instead of true and restart Finder . The Quit Finder menu item will disappear (and Finder will go back to being un-quittable in the UI).
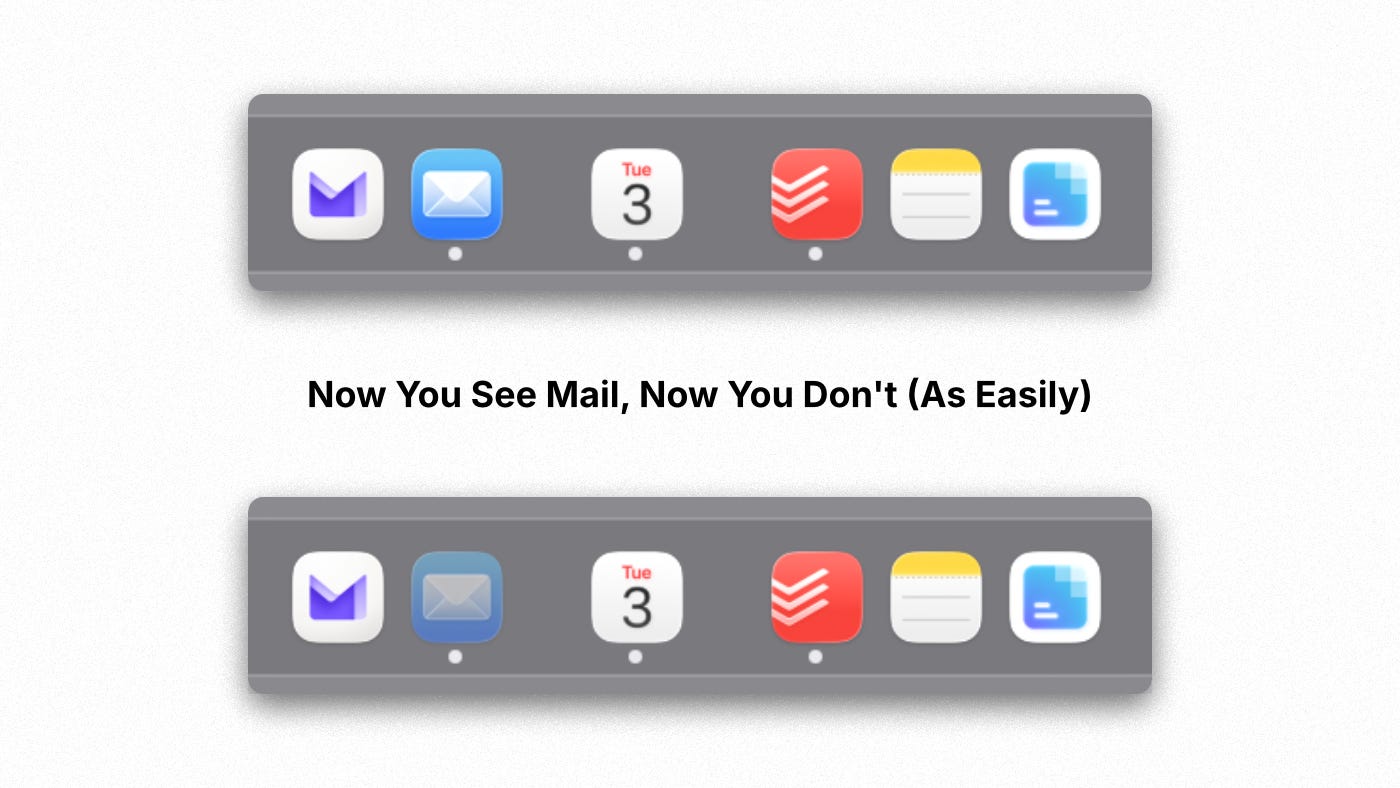
Make Hidden App Icons Translucent in the Dock
Have you ever hidden an app (with Cmd + H) and wondered which apps are hidden? This tweak makes it obvious: any hidden application’s Dock icon becomes translucent . It’s a subtle UI change that I personally love when I want to get focused in and pair it up with hiding the dock. Once enabled, hidden apps appear ghosted, so you can tell at a glance what’s out of sight. This is great for designers like me who hide apps to reduce screen clutter, yet want a visual reminder of what’s still running in the background.
To enable translucent hidden icons, use:
defaults write com.apple.dock showhidden -bool true; killall DockWhen the Dock comes back (it will restart automatically with killall), any app you hide (via Cmd+H or by Option-clicking away) will have a semi-transparent icon in the Dock . Unhide the app (bring it to foreground) and the icon returns to normal opacity. Take a moment to try it: hide an app and watch its icon dim — pretty cool, right?
Revert: If you prefer the Dock icons not doing this, or like me use it sporadically and temporarily depending on the situation, just reverse it by running:
defaults write com.apple.dock showhidden -bool false; killall DockThis sets the Dock behavior back to default (no transparency for hidden app icons). In other words, replace “true” with “false” (or “yes” with “no”) and restart the Dock to undo the ghost effect .
Dock Customization & Organization
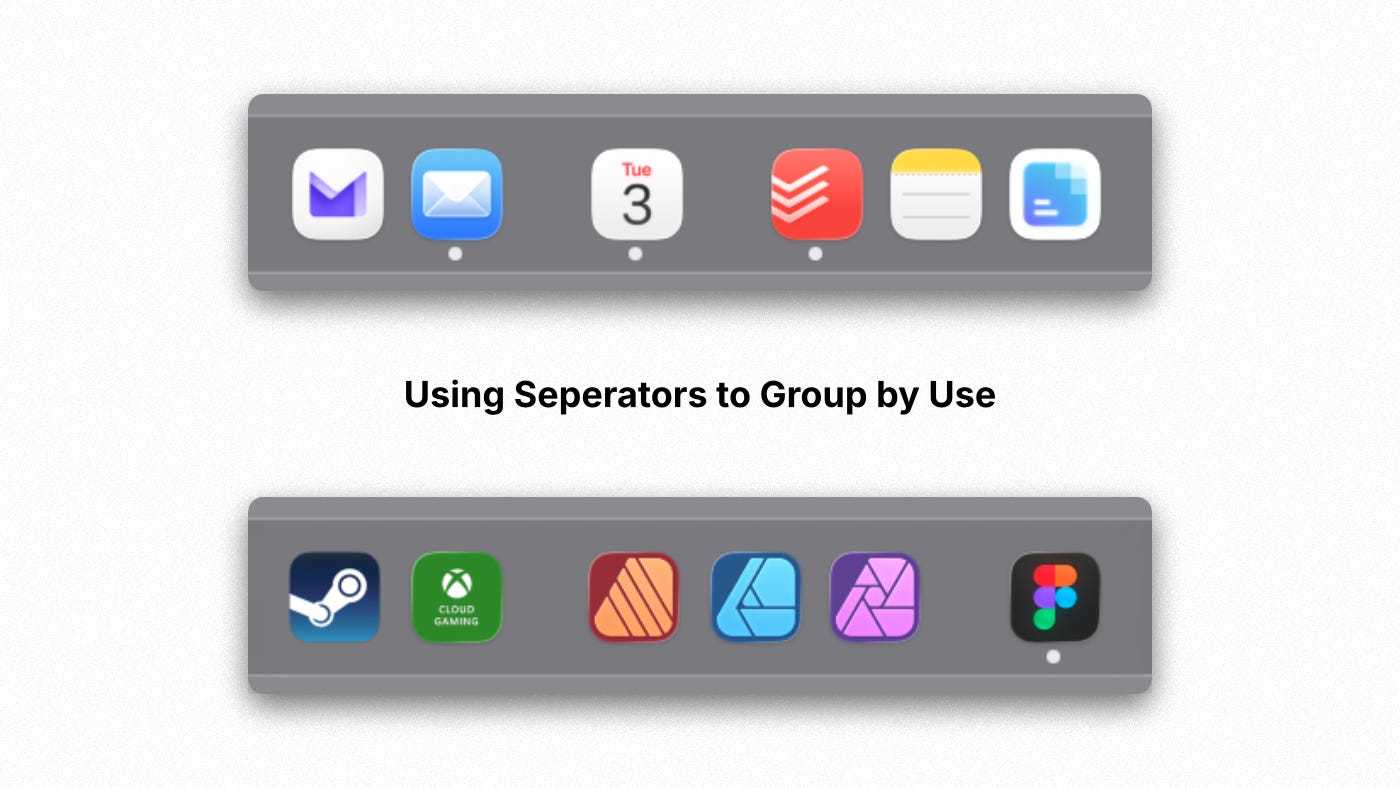
Adding Dock Spacers
This is my favorite “I have my life together” illusion.
If your Dock is basically a long row of “apps I totally use on purpose,” spacers are a tiny tweak that makes it feel organized without changing how anything works. I use them to create visual groups like Work, Design, Comms, Random. It scratches the same itch as alphabetizing your pantry, but with less effort.
Add a regular spacer
Paste this into Terminal and press Return:
defaults write com.apple.dock persistent-apps -array-add '{"tile-type"="spacer-tile";}'; killall DockAdd a small spacer
Same idea, just smaller and usually works better for vertical docks:
defaults write com.apple.dock persistent-apps -array-add '{"tile-type"="small-spacer-tile";}'; killall DockAfter the Dock restarts, drag the spacer(s) wherever you want, like any other Dock icon.
Remove spacers
Just remove them like an app icon. Drag the spacer off the Dock, or right-click it and choose Remove from Dock.
Optional extra: spacers on the “Documents” side of the Dock
If you want separators over by Downloads, folders, and minimized windows, use persistent-others instead of persistent-apps.
defaults write com.apple.dock persistent-others -array-add '{"tile-type"="small-spacer-tile";}'; killall DockShow only running apps in Dock
Want to go more minimalist? This is a “clean Dock” mode. Only currently running apps show up.
defaults write com.apple.dock static-only -bool true; killall DockRevert: Replace true with false.
Minimizing Window Animations
If you miss that old-school “vacuum into the Dock” effect, this brings it back. I’ve always had a soft spot for this animation when minimizing windows.
defaults write com.apple.dock mineffect -string "suck"; killall DockRevert:
defaults write com.apple.dock mineffect -string "genie"; killall DockDisable Rubber-Band Scrolling
This removes that “bounce” when you scroll past the top or bottom.
defaults write -g NSScrollViewRubberbanding -int 0Revert: Replace 0 with 1.
Remove the Delay When Hiding & Showing the Dock
This one is for the speed demons out there. The macOS Dock can auto-hide, which is great for screen real estate and getting into a focus state, but by default it has a slight delay and animation when appearing. If you, like me, have the patience of a goldfish when you get into a productive flow, you can make the Dock appear instantly when you hover at the screen edge. This involves tweaking two related settings: the show/hide delay and the animation time.
1. Remove Dock Autohide Delay:
This delay is the short pause before the Dock begins to show. The default is about 0.2 seconds . To eliminate it, run:
defaults write com.apple.dock autohide-delay -float 0; killall DockNow, when you push your cursor to the screen edge, the Dock should pop up immediately with no pause. It makes your Mac feel snappier.
2. Speed Up the Dock Animation:
Even with no delay, the Dock still takes ~0.5s to slide in/out (that’s the animation duration) . You can reduce this too. For instance, set it to 0 for an instant pop-in:
defaults write com.apple.dock autohide-time-modifier -float 0; killall DockWith both delay and time modifier at 0, the Dock will appear and disappear with zero lag — it just blinks in and out . (If that’s too jarring, you can use a small value like 0.1 instead of 0 to keep a tiny quick animation.)
(Image suggestion: Maybe a comparison graphic of the Dock appearing with delay vs without, though this might be hard to capture in a single image)
Revert: To go back to the default behavior, you can delete these custom values. For delay:
defaults delete com.apple.dock autohide-delay; killall DockAnd for the animation time:
defaults delete com.apple.dock autohide-time-modifier; killall DockDeleting the keys restores Apple’s defaults (0.2s delay and 0.5s animation, respectively) . Alternatively, you could set the float values back to 0.2 and 0.5 if you remember them. But hey, I suspect once you get used to the snappy Dock, you won’t miss the old sluggish slide.
Hide All Desktop Icons
For when your desktop has become a junk drawer, or for easy privacy on screen sharing. Personally I enjoy the clean, and distraction free look it provides.
defaults write com.apple.finder CreateDesktop -bool false; killall FinderRevert: Replace false with true.
Screenshot Tweaks
Disable the Drop Shadows on Screenshots
Ever notice how when you take a screenshot of a window (using CMD + Shift + 4 then Spacebar and click), macOS adds a nice drop shadow around the window in the image? Aesthetically pleasing, perhaps, but as a designer I sometimes want cleaner screenshots (for example, when compositing images). There’s a hidden setting to remove the shadow from window screenshots.
Removing the Shadow:
defaults write com.apple.screencapture disable-shadow -bool true; killall SystemUIServerAfter running this, any new window screenshots you take will have no shadow — just the window itself . This can look more professional when dropping screenshots into documents or designs (no more weird fuzzy edges). The killall SystemUIServer command refreshes the system UI daemon to apply the change immediately .
Revert: To bring back the default shadows, run the same command with -bool false and then kill SystemUIServer again . Your window screenshots will once more include the drop shadow (which, admittedly, can make them look more 3D on wallpapers or webpages).
Change screenshot file format to JPEG
For further customization, you can change the default PNG format to JPG.
defaults write com.apple.screencapture type -string "jpg"; killall SystemUIServerRevert: Replace “jpg” with “png”.
Change default screenshot save location
I like this because it keeps my Desktop from becoming a screenshot landfill. I have a specific folder just for screenshots I have as a default to audit and clean later.
defaults write com.apple.screencapture location -string "$HOME/Pictures/Screenshots"; killall SystemUIServerRevert:
defaults delete com.apple.screencapture location; killall SystemUIServerDisable floating thumbnail preview
Turns off the little preview that appears after you take a screenshot. Sometimes it’s useful, but most of the time I find it annoying and getting in the way. Especially if I’m taking a batch of screenshots and it keeps popping up like Whack-a-Mole…
defaults write com.apple.screencapture show-thumbnail -bool false; killall SystemUIServerRevert: Replace false with true.
System & Quality of Life Improvements
Always expand “Save” dialog
If you hate clicking the little disclosure triangle every time you save, this fixes it.
defaults write NSGlobalDomain NSNavPanelExpandedStateForSaveMode -bool true
defaults write NSGlobalDomain NSNavPanelExpandedStateForSaveMode2 -bool true
Revert: Replace true with false.
Always expand “Print” dialog
Same idea, but for printing.
defaults write NSGlobalDomain PMPrintingExpandedStateForPrint -bool true
defaults write NSGlobalDomain PMPrintingExpandedStateForPrint2 -bool true
Revert: Replace true with false.
Save files locally (not iCloud) by default
Stops macOS from trying to push everything into iCloud Drive first.
defaults write NSGlobalDomain NSDocumentSaveNewDocumentsToCloud -bool falseRevert: Replace false with true.
Stop creating .DS_Store files on network drives
If you work with network shares, this keeps macOS from sprinkling .DS_Store everywhere.
defaults write com.apple.desktopservices DSDontWriteNetworkStores -bool trueRevert: Replace true with false.
Re-enable key repeat (disable accent menu)
If you want press-and-hold to repeat keys (for games, shortcuts, or just typing fast), do this.
defaults write -g ApplePressAndHoldEnabled -bool falseRevert: Replace false with true.

Privacy
Prevent Photos from opening automatically
Stops Photos from launching every time you plug in a phone or camera.
defaults -currentHost write com.apple.ImageCapture disableHotPlug -bool trueRevert:
defaults -currentHost delete com.apple.ImageCapture disableHotPlugDisable “Downloaded from Internet” warning
This removes the quarantine warning for downloaded apps.
defaults write com.apple.LaunchServices LSQuarantine -bool falseRevert: Replace false with true.
Final Thoughts
These are just a few of the many hidden settings (“defaults write” tweaks) that can tailor your Mac to your liking. Apple doesn’t provide GUI switches for these, but as you’ve seen, a quick Terminal command can work magic — whether it’s speeding up the Dock, revealing files, or adjusting Finder’s behavior.
As a designer who strayed from a formal CS path, I find it empowering (and a bit humorous) that I can still hack my system in simple ways — it’s like having a secret control panel for macOS. Just remember that with great power comes great responsibility: always double-check commands and be sure you understand them. The ones I’ve listed are safe and easily reversible, and I’ve personally used all of them without issues. If something doesn’t behave as expected, you can typically revert by changing “true” to “false” or deleting the custom setting.
If you have the itch for further customization and want to dive deepr. Then go check out: https://macos-defaults.com/ to find more. These are a few of my favorites and you may find some there that work better for you.
Feel free to experiment and make your Mac truly yours. After all, one big reason we use Macs is because they can be tweaked and tuned exactly how we want! Happy customizing!
Still Curious?
Browse One of My Other Case Studies, Writings, Resources, Or Reach out for a Chat.
You can contact and connect with me through email, on Dribbble, or LinkedIn as well.